I admit it.
I've been known to make impulse buys while doing my weekly grocery shopping. Especially at this time of year when the aisles are laden with "holiday flavors" of all my favorite things.
So when I spotted a bag of Candy Cane Kisses, completely out of place, on my way to the checkout line a couple weeks ago, it took me all of 3 seconds to throw it in my cart.
Peppermint and white chocolate? Yes, please!
After I got home, I noticed a cookie recipe on the back of the package. And in spite of the hideous picture that accompanied the recipe, I decided the cookies sounded yummy and I wanted to make them. So I did. And I was right. Oh boy was I right.
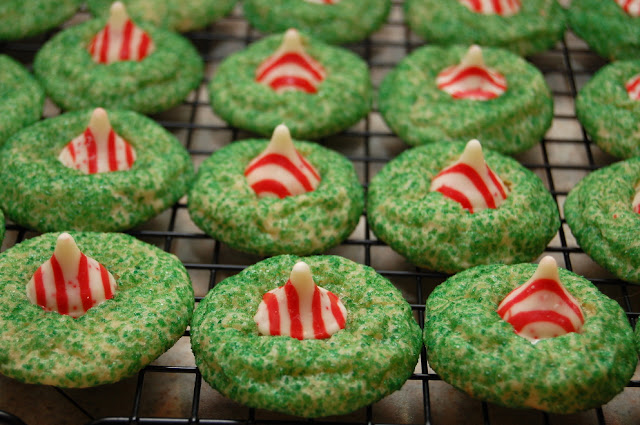
And don't you just want to taste one?
Well, lucky for you, I'm going to tell you how to make them. You can find the original recipe on the Hershey's website, but my recipe below includes a few helpful things I learned through the process of making 96 of these little goodies. And don't be alarmed by how many steps are in the recipe--I broke it down into very small steps to make it easier to read and follow.
And here are a few more pictures to convince you of the your need to bake these:

Now that your mouth is watering, go bake some cookies!
I've been known to make impulse buys while doing my weekly grocery shopping. Especially at this time of year when the aisles are laden with "holiday flavors" of all my favorite things.
So when I spotted a bag of Candy Cane Kisses, completely out of place, on my way to the checkout line a couple weeks ago, it took me all of 3 seconds to throw it in my cart.
Peppermint and white chocolate? Yes, please!
After I got home, I noticed a cookie recipe on the back of the package. And in spite of the hideous picture that accompanied the recipe, I decided the cookies sounded yummy and I wanted to make them. So I did. And I was right. Oh boy was I right.
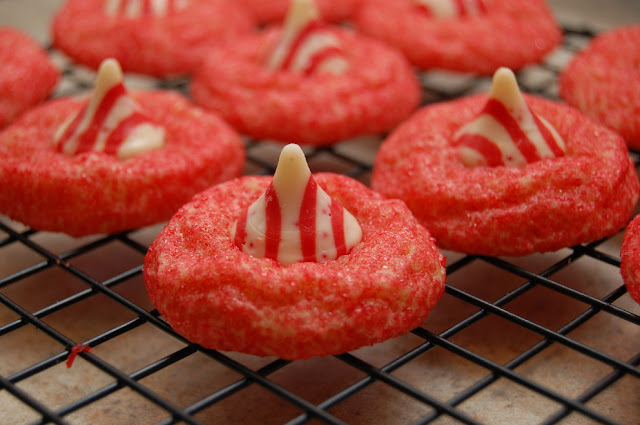
The cookies were delicious and fun. Fun to look at and fun to eat. Can't you just tell by looking at them how fun they are?


And don't you just want to taste one?
Well, lucky for you, I'm going to tell you how to make them. You can find the original recipe on the Hershey's website, but my recipe below includes a few helpful things I learned through the process of making 96 of these little goodies. And don't be alarmed by how many steps are in the recipe--I broke it down into very small steps to make it easier to read and follow.
Candy Cane Kisses Cookies
Ingredients:
48 Hershey’s Candy Cane Kisses
½ cup butter or margarine, softened
1 cup granulated sugar
1 egg
1-½ teaspoons vanilla extract
2 cups all-purpose flour
¼ teaspoon baking soda
¼ teaspoon salt
2 tablespoons milk
Red and/or green sugar crystals
Directions:
- Preheat oven to 350° F.
- In a large bowl, beat butter, granulated sugar, egg, and vanilla until well blended.
- In a small bowl, stir together flour, baking soda, and salt.
- Alternately add the flour mixture and the milk to the butter mixture, beating until well blended.
- Chill dough in refrigerator or freezer until able to be worked into balls (dough is extremely sticky when first mixed).
- While dough is chilling, remove wrappers from candies and set aside. You might want to unwrap a few extras, just in case you happen to eat a few while you are finishing up the cookies!
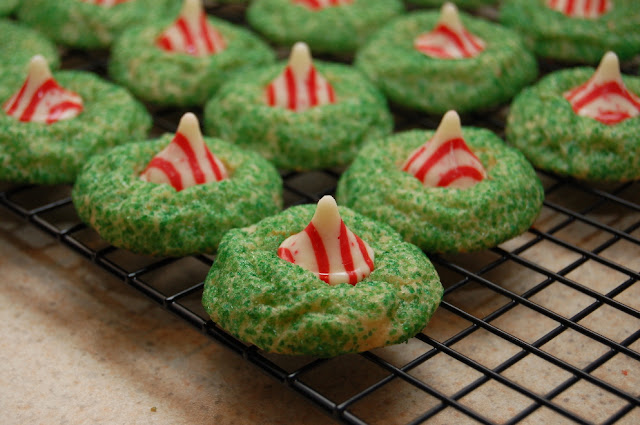
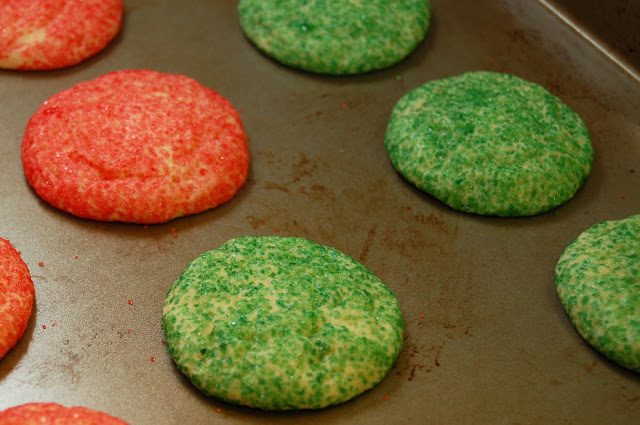
- When dough is ready, shape into 48 one-inch balls and roll in red or green sugar crystals.
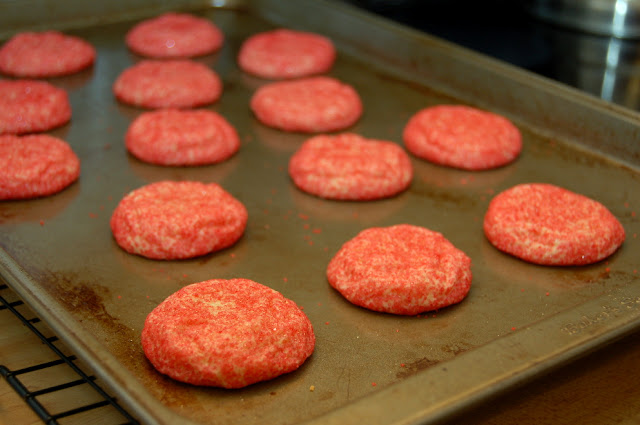
- Bake on ungreased cookie sheet for 8 to 10 minutes. Cookies will look under-baked when first taken out of the oven, but they will finish baking and firming up while they cool on the pan. I found 8 minutes of baking was perfect, but it will vary depending on your oven.
- Allow cookies to cool on the pan for about 3 minutes before pressing a Kiss into the center of each cookie. You’ll want to set a timer for this so that you don’t forget to put the Kisses in while the cookies are still soft. Also, don’t rush this cooling time! If the cookies are too hot when the Kisses are placed into them, the Kisses will melt into little piles of lava. Even when you do this correctly, some of the Kisses will start to melt a bit. Just experiment with the best waiting time and try not to jostle the cookies too much once the Kisses have been placed in.
- Carefully remove the cookies from the baking sheet and place on a cooling rack until completely cooled. Actually, it’s okay to eat the cookies before they cool completely—just be aware that the Kisses will be very soft and may turn into a pile of dripping melted chocolate when you eat them. It’s kind of like eating a cookie s’more. Messy but oh so yummy.
- Last but not least, you really should take these cookies to a Christmas party so people can oooh and ahhh over how fun they look and how good they taste.
And here are a few more pictures to convince you of the your need to bake these:


Now that your mouth is watering, go bake some cookies!
Courtney these are beautiful!!! You are inspiring me to bake some to take to friends.
ReplyDeleteLove you,
Grandma
These do taste as good as they look. I'd also like to try the brown and white stripe with cinnamon and sugar coating.
ReplyDelete